Creating Google Cloud Project
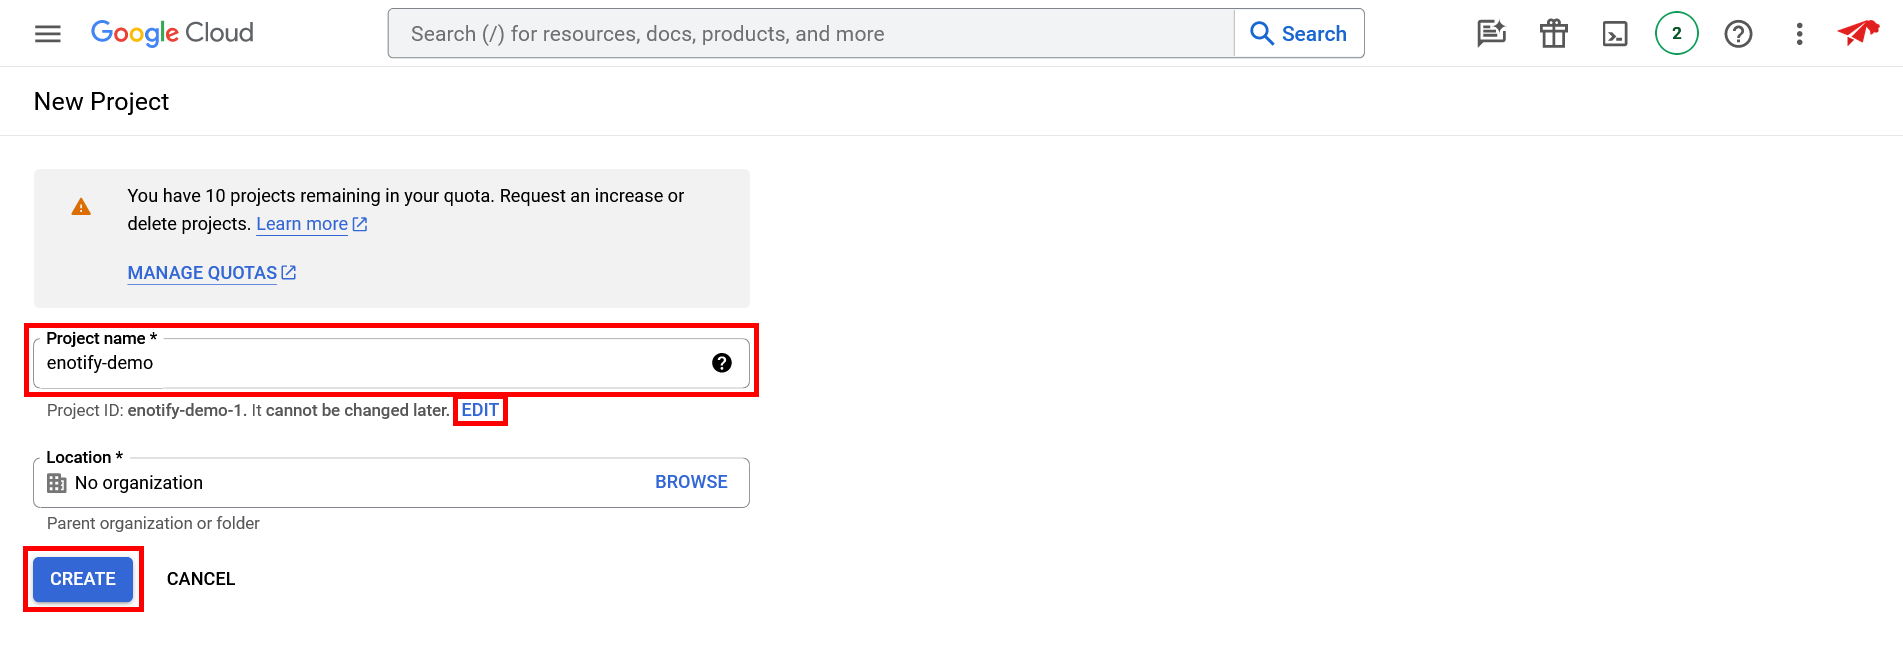
Firstly, head over to Google Cloud Console > New Project and make sure you are logged into the google account you wish to create the Google Cloud Project on.
Give your project a name, and optionally, a custom ID, then press CREATE.
Enable Gmail API
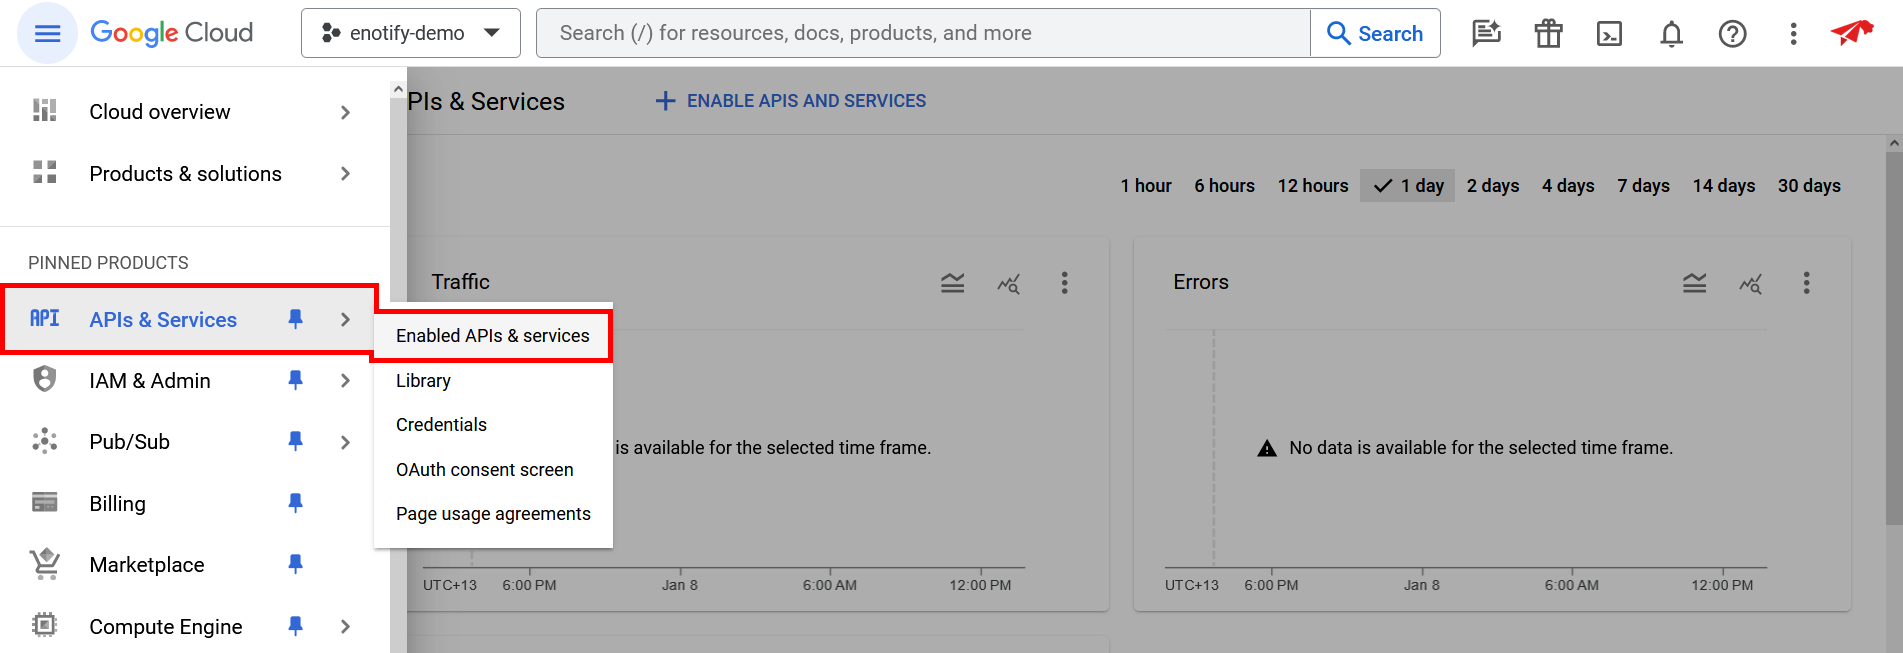
In your newly created project, navigate to APIs & Services > Enabled APIs & Services.
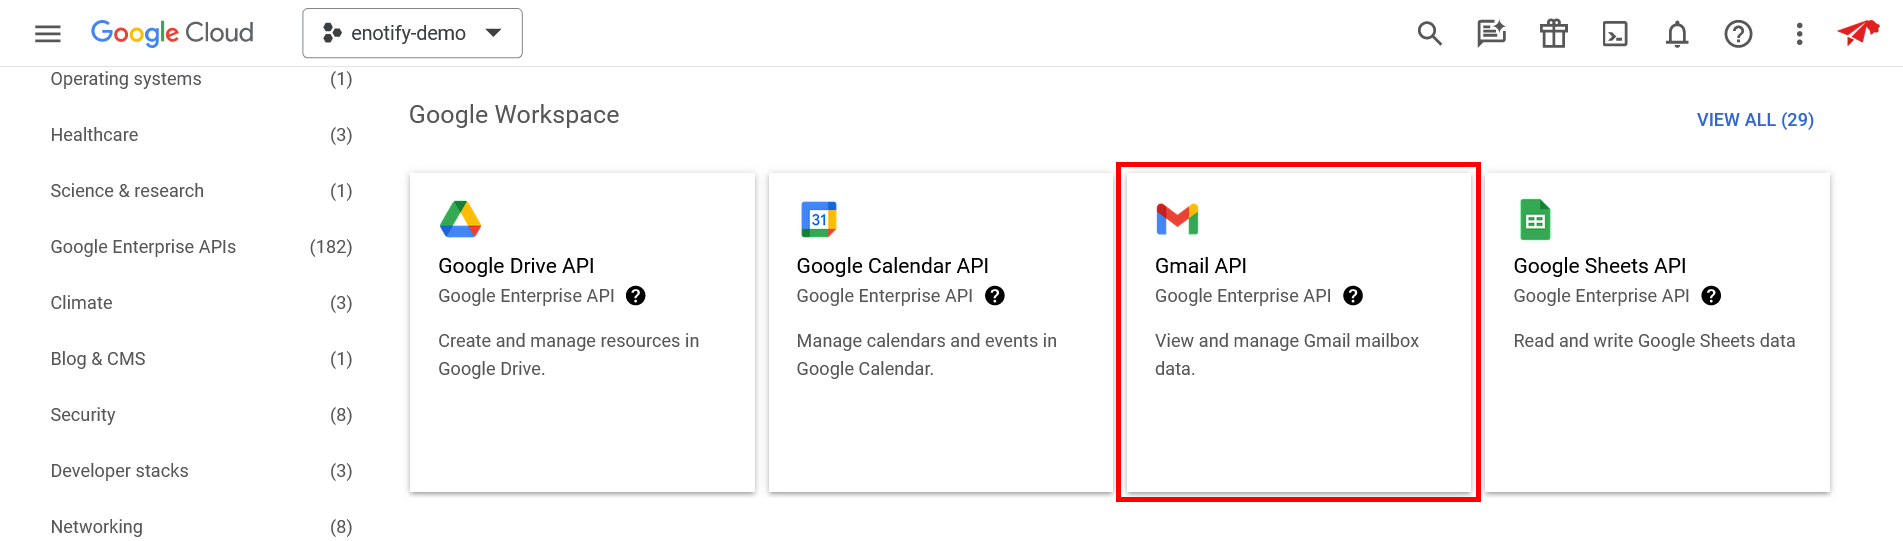
Press the + ENABLE APIS AND SERVICES button at the top of the page, then scroll down and select the Gmail API panel listed under the Google Workspace category.

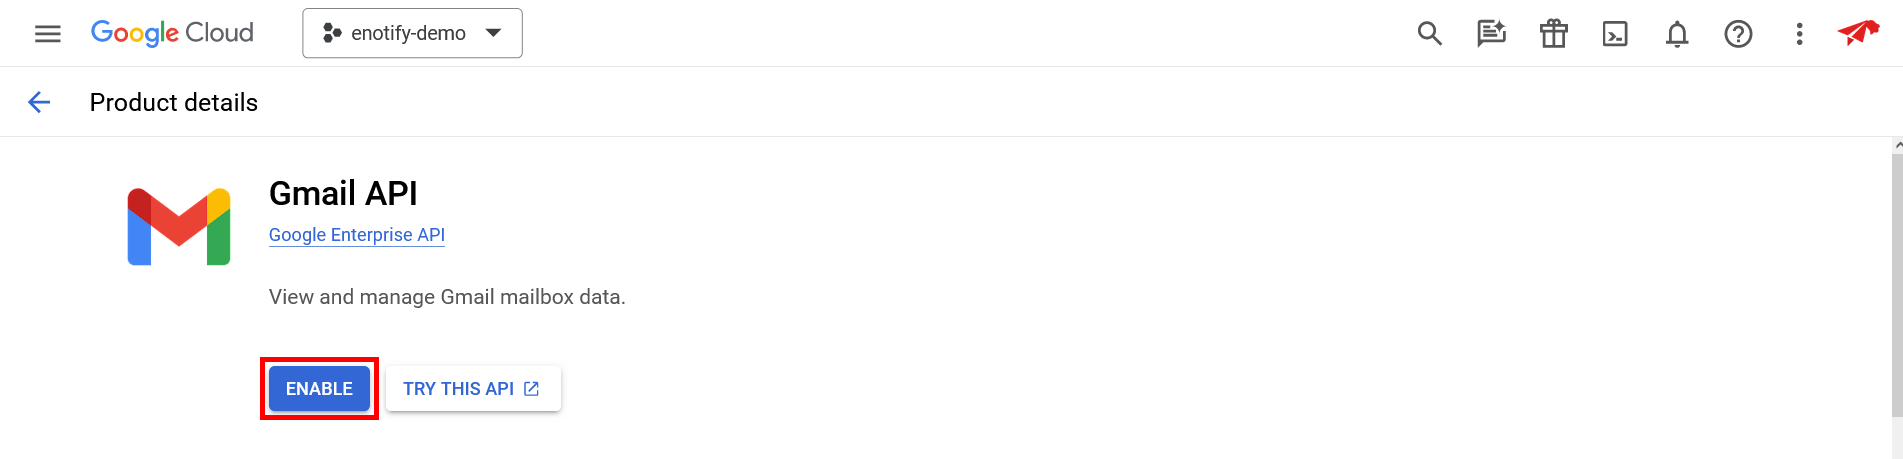
Once on the Gmail API page, press the ENABLE button to enable the Gmail API.
Create credentials
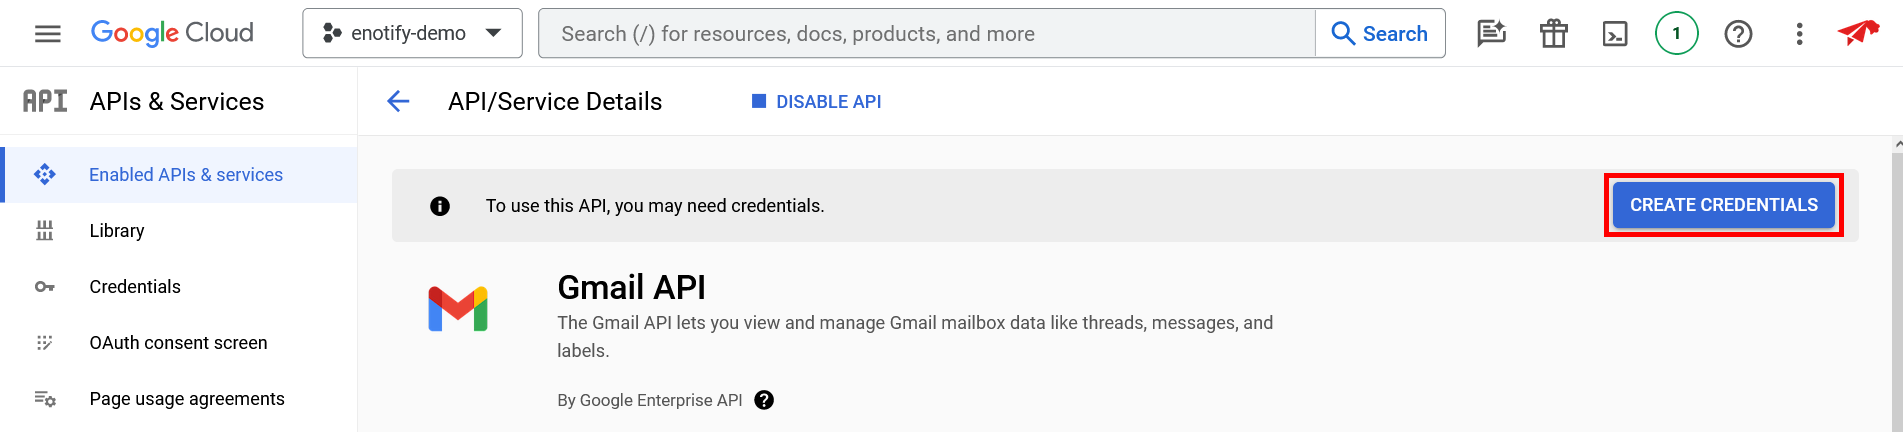
After enabling the Gmail API, you must create credentials in order to interact with it. Press the CREATE CREDENTIALS button.
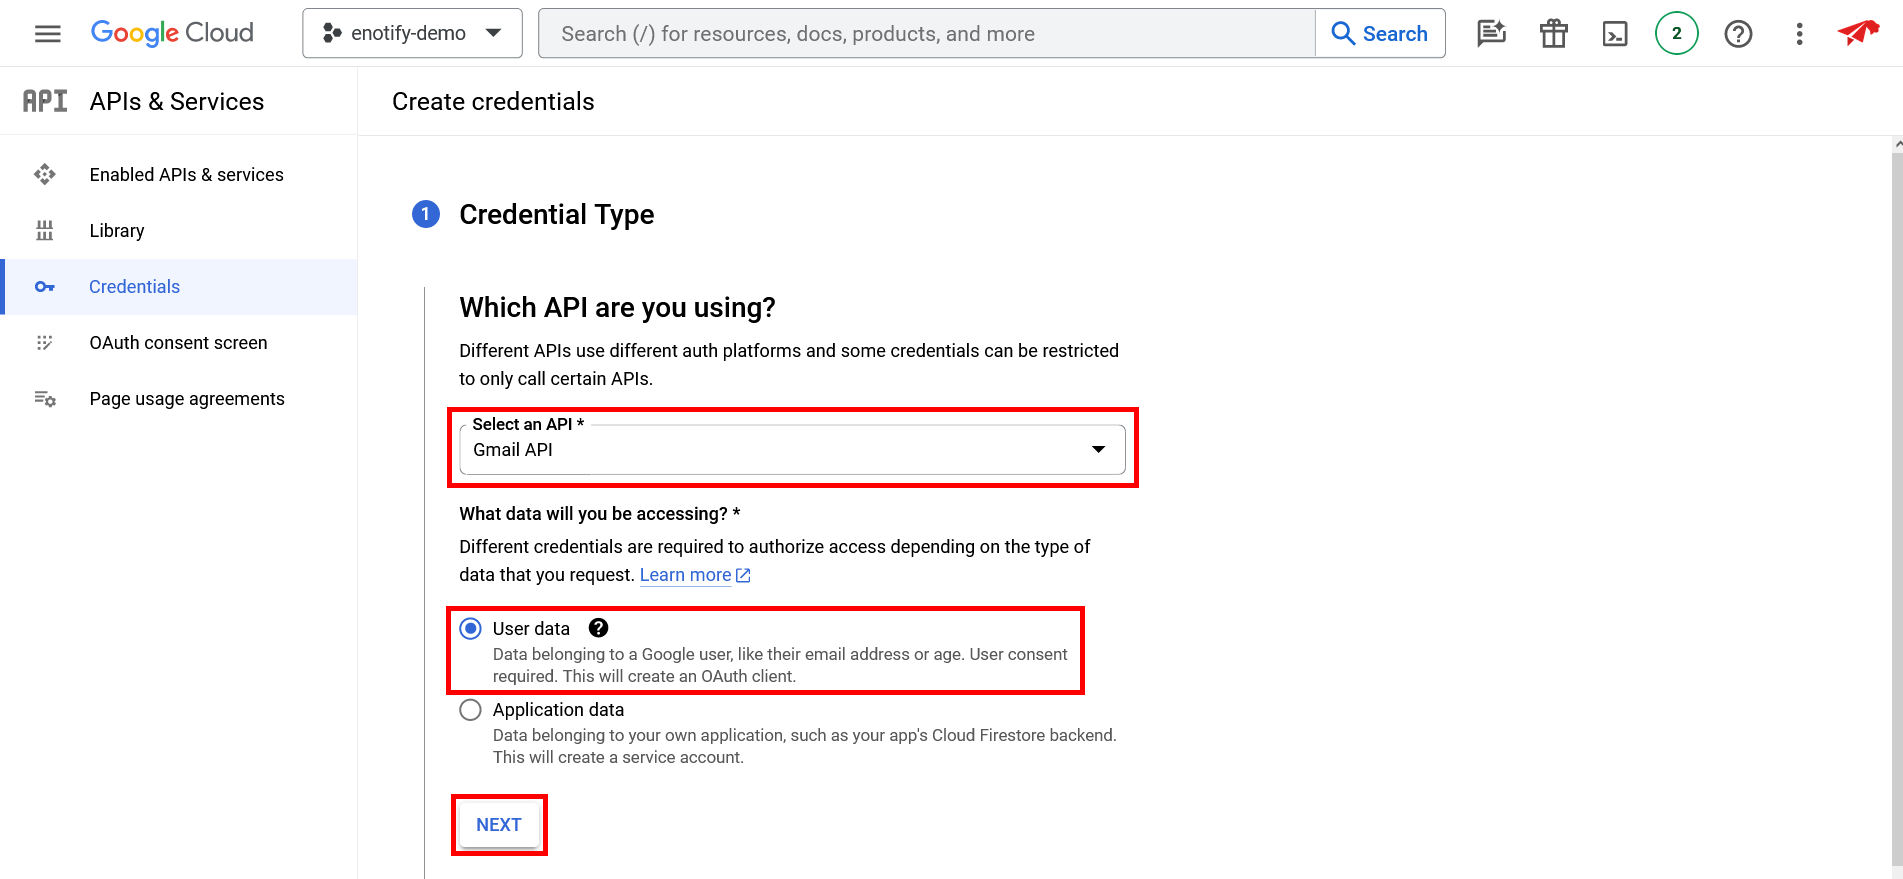
In the Select an API dropdown, ensure that Gmail API is selected. Select User data and press NEXT.
Choose an App name, select an available User support email, add at least one email address under Developer contact information, and optionally, upload a logo. Once complete, press SAVE AND CONTINUE.

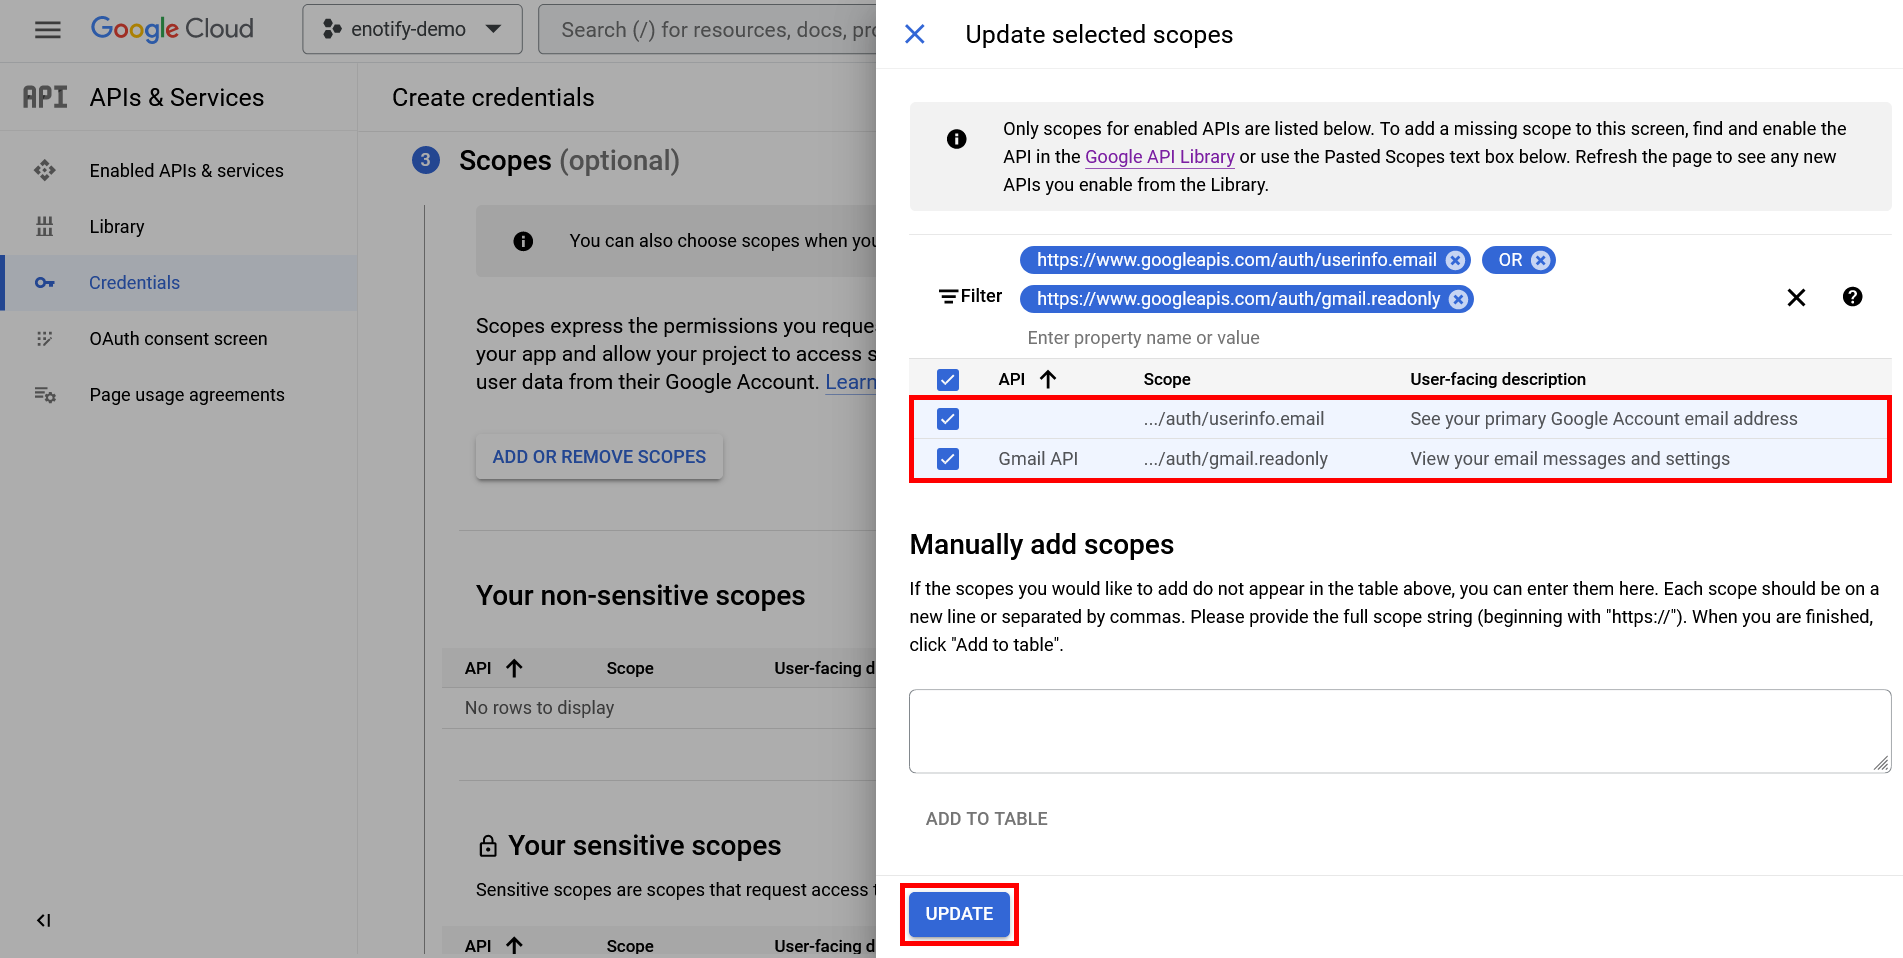
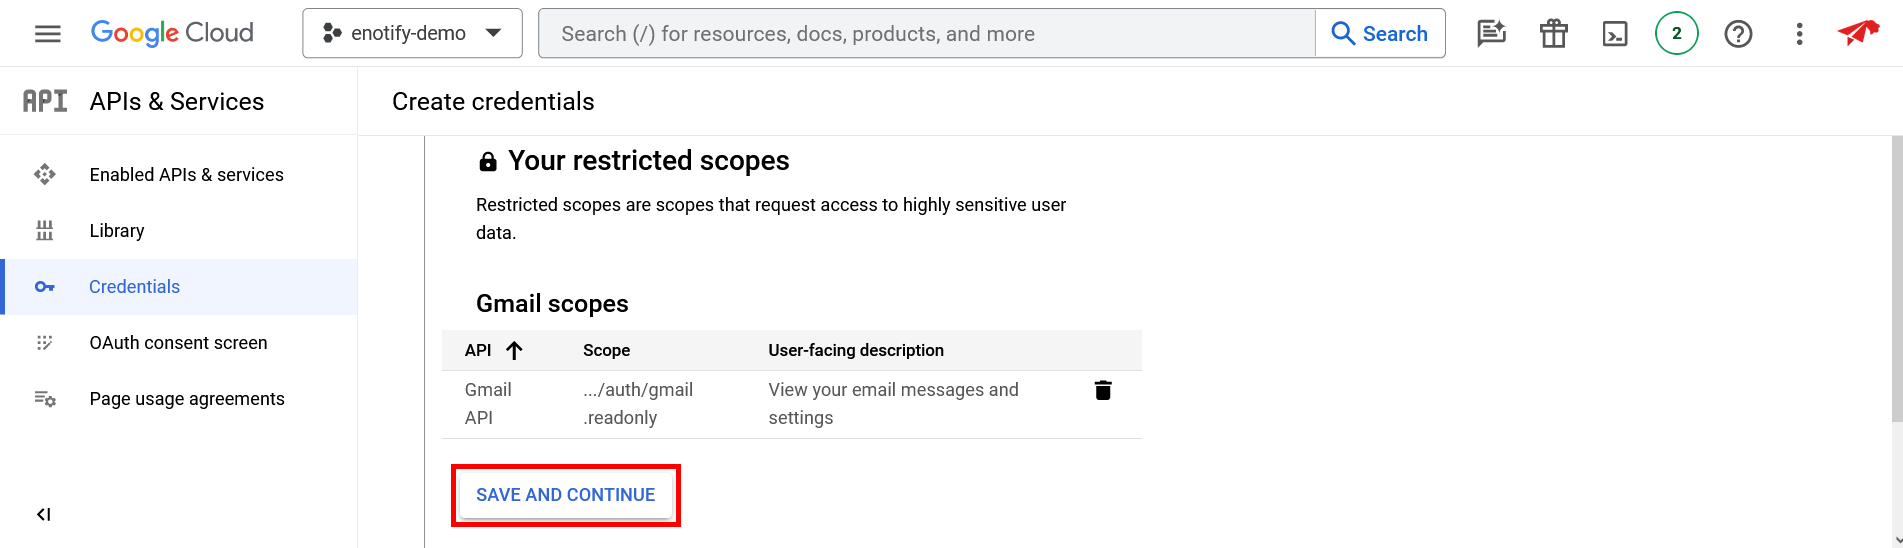
Next, you must add the scopes required in order for Enotify to function. First press ADD OR REMOVE SCOPES, then select https://www.googleapis.com/auth/userinfo.email as well as https://www.googleapis.com/auth/gmail.readonly. Once both are selected, press UPDATE.

Scroll down to the bottom of the Scopes section and press SAVE AND CONTINUE.
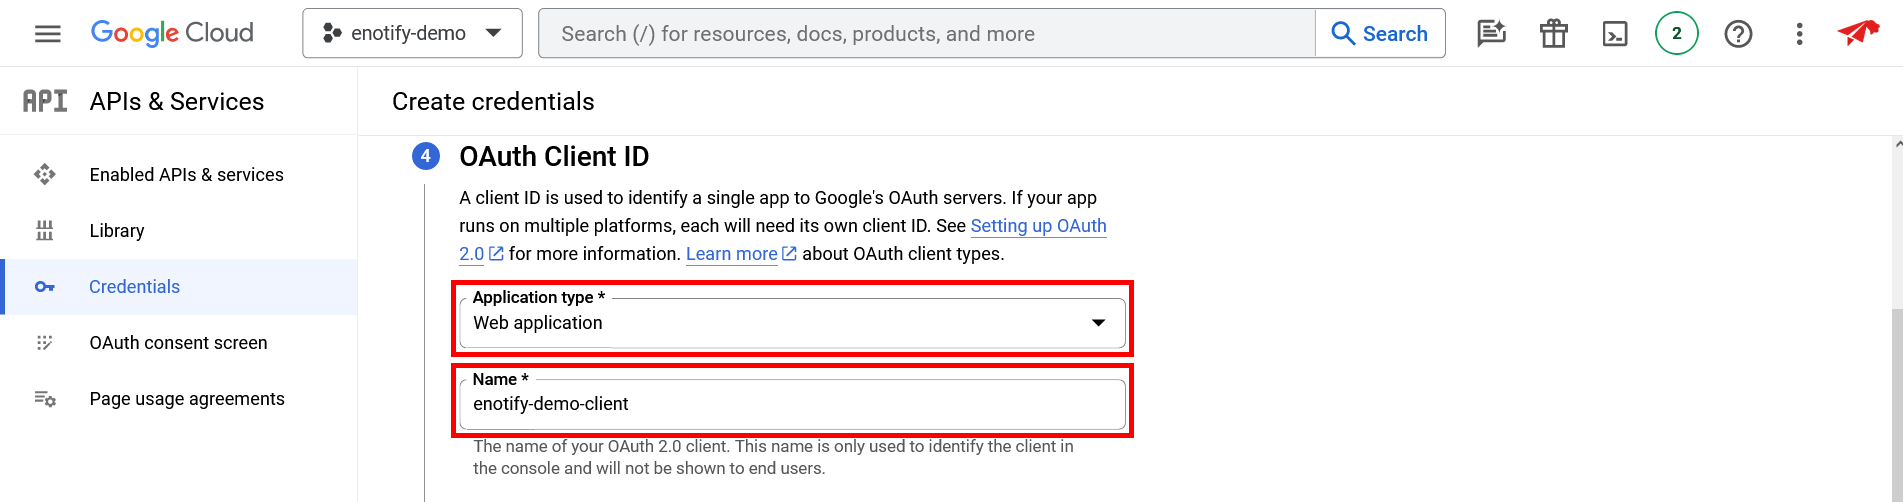
Next, you must setup your OAuth Client ID. For Application type select Web application, and choose a name for your client ID.
Under Authorized JavaScript origins, add the base URL that you will be hosting your instance of Enotify's website on. In this example, we are using https://example.com as a base URL.
Under Authorized redirect URIs, add the base URL that you will be hosting your instance of Enotify's website on, followed by the /gmail/callback route. In this example we are using https://example.com as a base URL, therefore we add https://example.com/gmail/callback as an Authorized redirect URI.
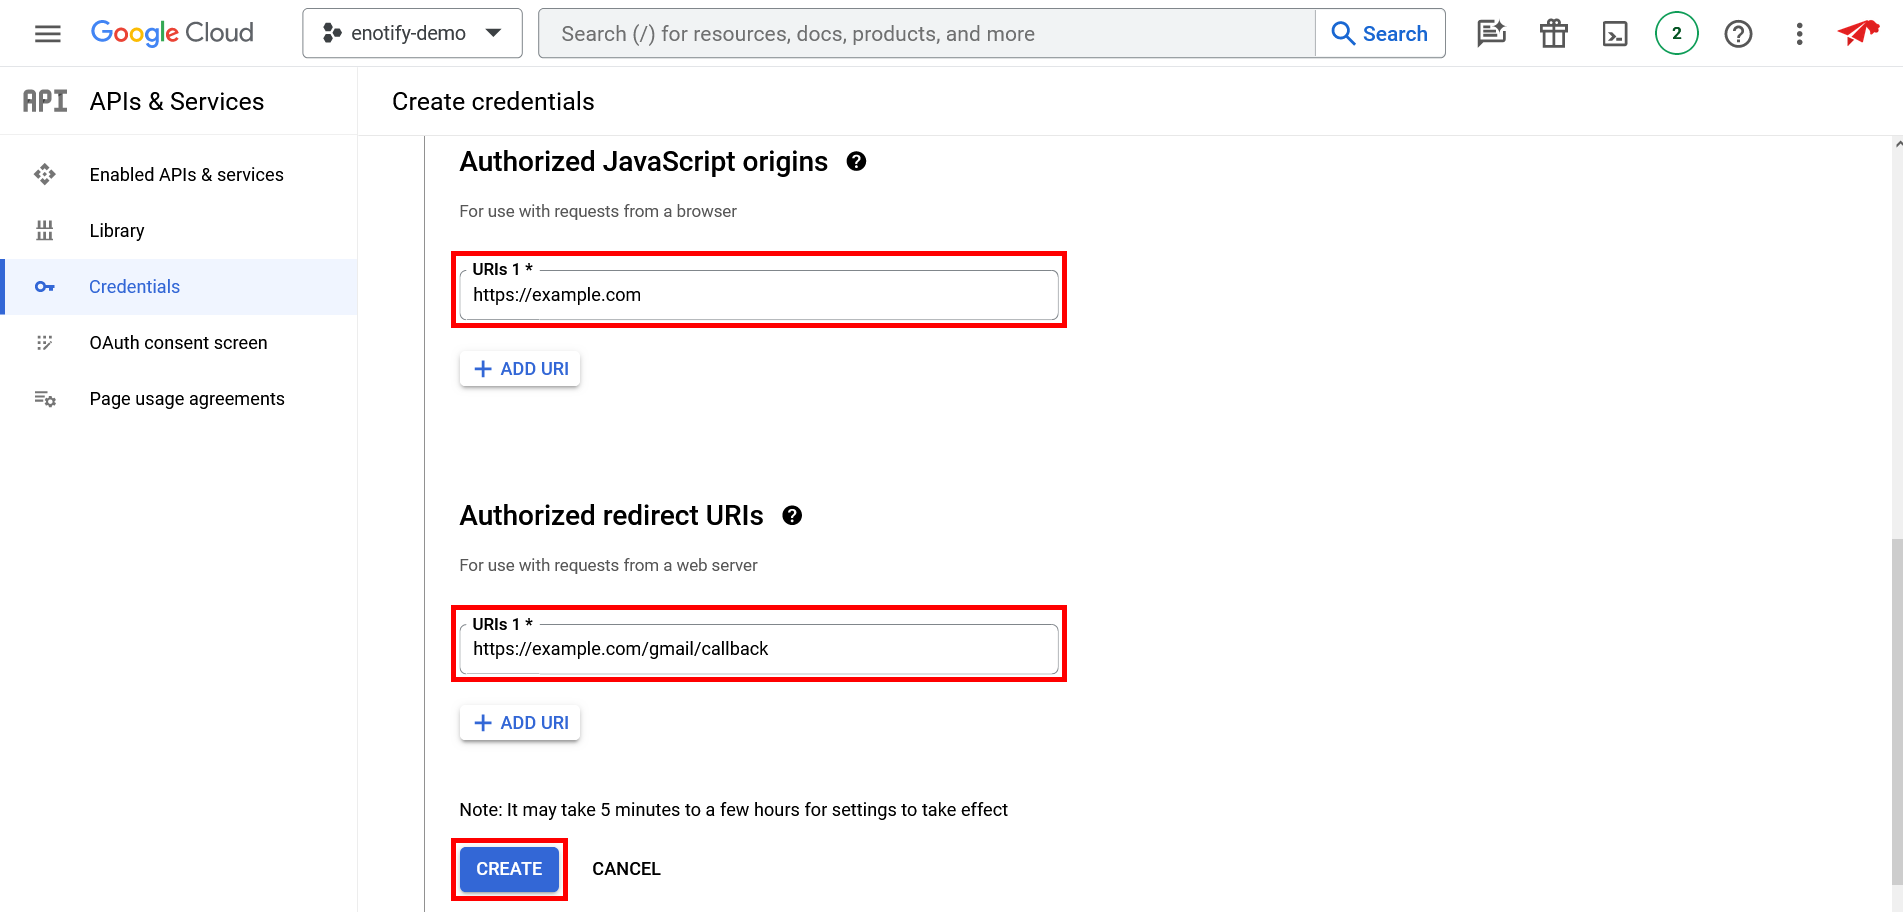
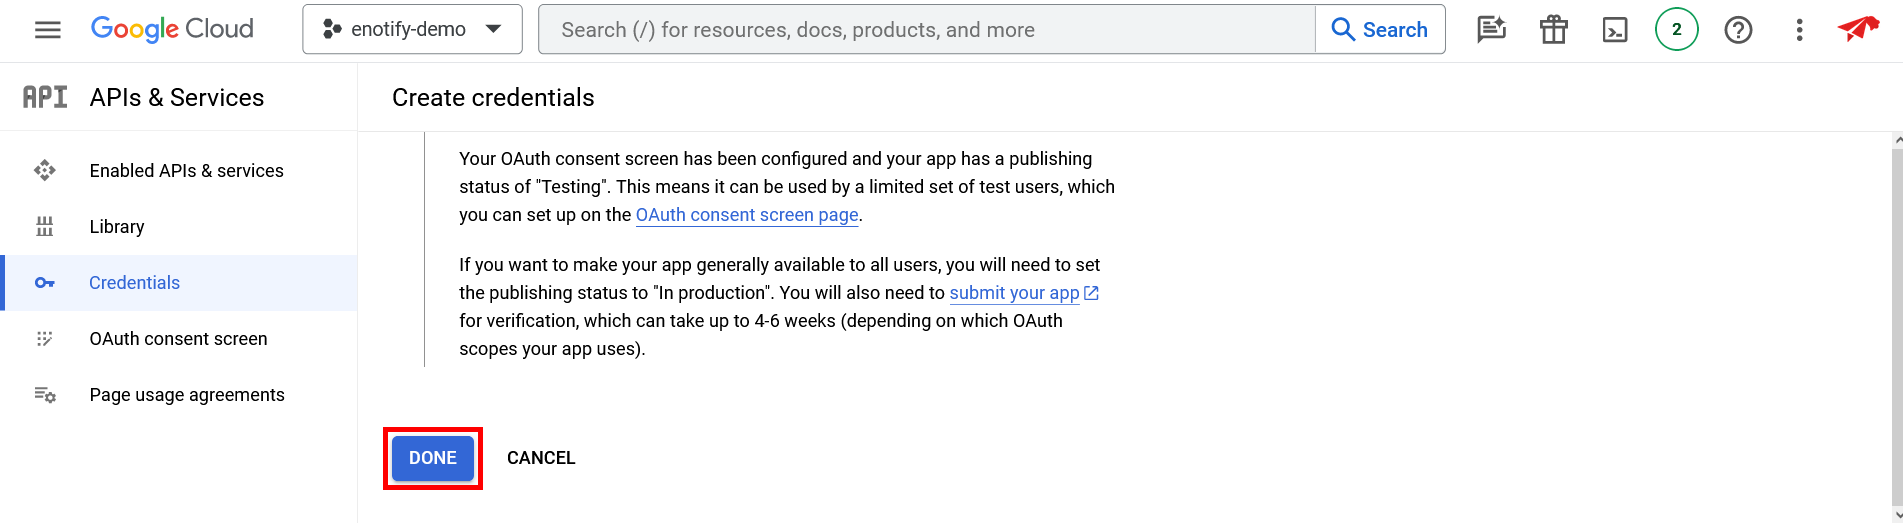
Scroll down to the bottom of the Create credentials page, and press DONE.
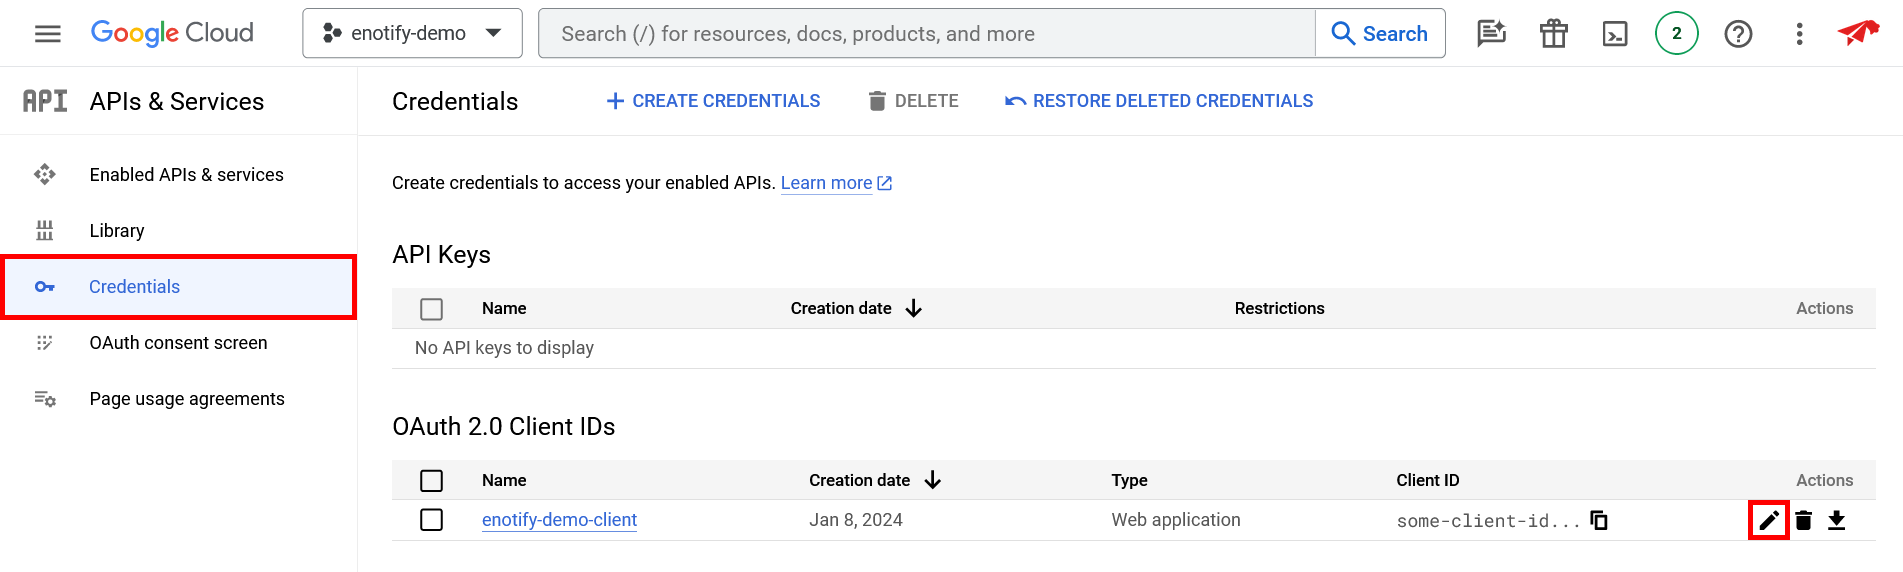
Save credentials
Now that you have created your OAuth Client ID, you must save the credentials for it. Navigate to the APIs & Services > Credentials page, and press the pencil (edit) button next to your newly created OAuth client ID.
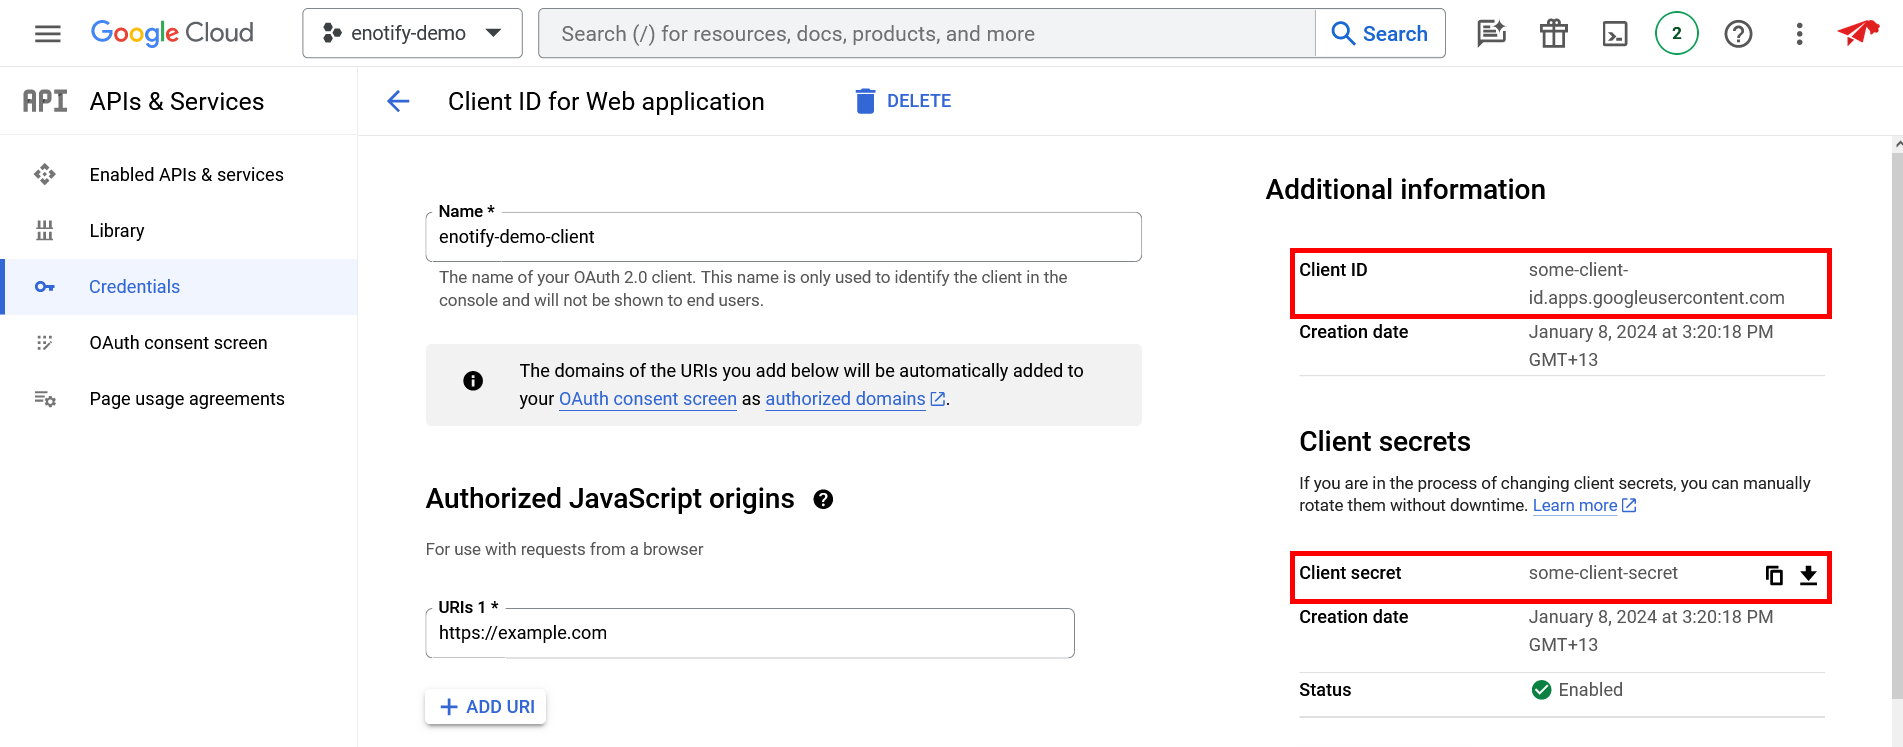
Copy the Client ID, and Client secret on the right side of the screen, open the .env file in the cloned repository's files, and paste them as the gcloud_client_id and gcloud_client_secret environment variable values.

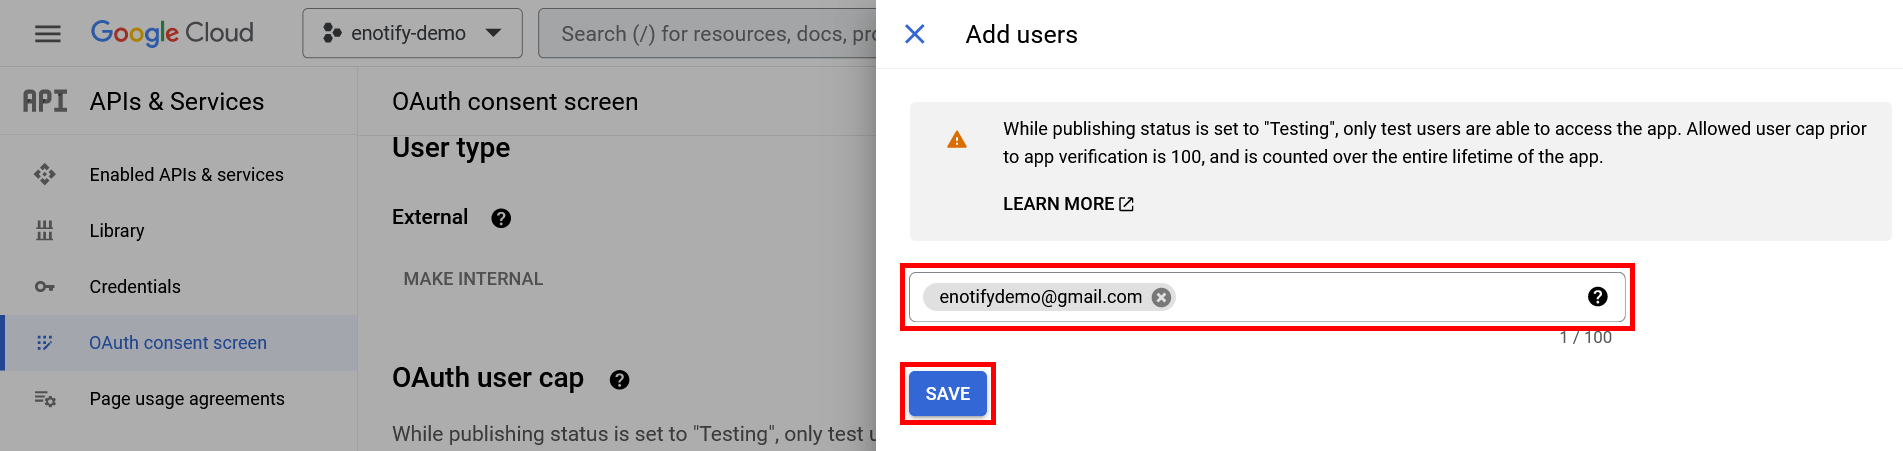
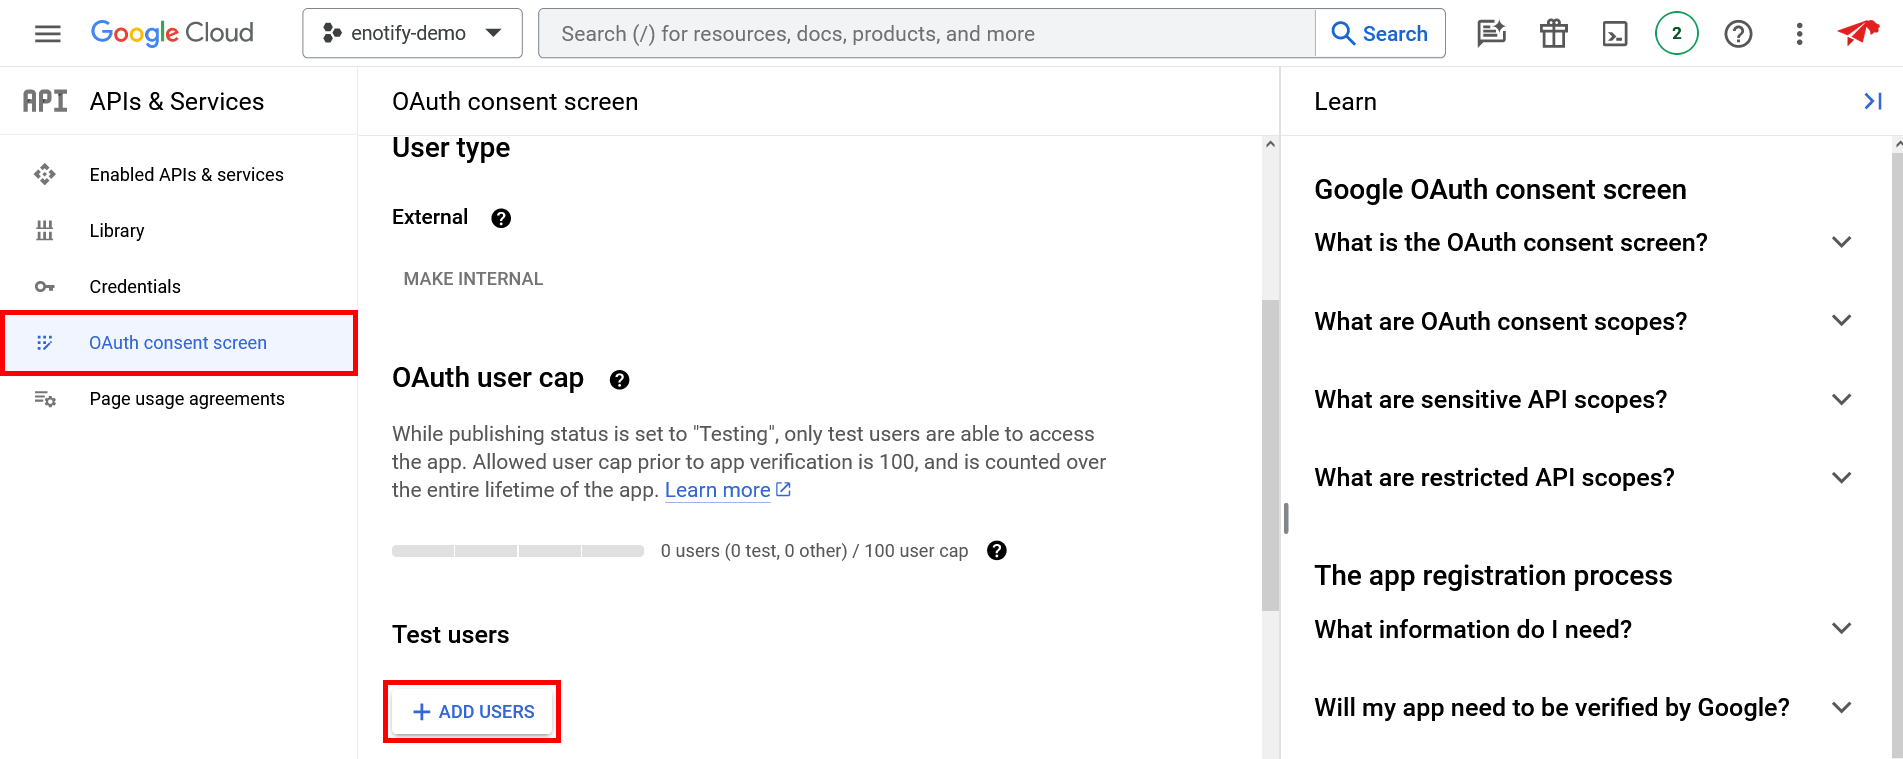
Add test users
In order to use the Gmail API with Enotify before your Google Cloud project is verified, you must add yourself as a test user.
To add yourself as a test user navigate to APIs & Services > OAuth consent screen and press the + ADD USERS button below Test users.
Enter the desired test user email address and press SAVE.